Cool Down With Snowman Earrings!
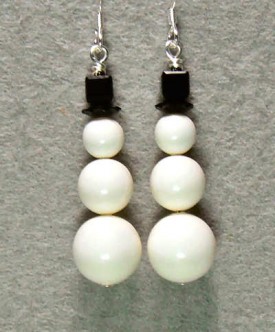
 This snowman earrings tutorial is kind of an “in between” look. It’s not holiday-only, like the Christmas tree earrings, nor is it a year ’round look like angel jewelry. But these teeny-tiny relatives of Frosty look good any time it’s winter!
Like the other two pieces of jewelry mentioned above, these are beginner-level. Intermediate an advanced beaders will undoubtedly come up with their own takes of these classic earrings.
Supplies and Directions for the Snowman Earrings
Very simple for the supplies; you’ll need the following.
- Two 10mm round beads
- Two 8mm round beads
- Two 6mm round beads
- Two 6mm marguerite beads
- Two 4mm cube beads
- Two headpins
- Pair of earring findings
- Pliers, cutters
I’ve made these with the Swarovski crystal beads in the new color called ivory. I thought it looked appropriately “snowy”, but this also looks amazing in crystal AB.
It will probably take you less than 3 minutes to make these frozen delights, which makes them great for last minute presents. So be sure to keep some extra supplies around. 🙂
You’ll also see a larger snowman that I made for a pendant, in the course of the video. He’s done in crystal AB.
Now that I’ve said all that, it’s time for the video. I hope you enjoy it!
Video Tutorial for Angel Earrings
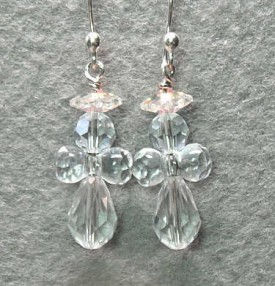
 This video tutorial for angel earrings is a fun way to have this lovely jewelry with you. Although traditionally worn around Christmas (like the Christmas tree earrings), they can really be worn year ’round.
The basic earrings for angels take maybe 3 minutes to make. They make a great last-minute gift when you need it the most! And you’ve got to love something like that. 🙂
Video Tutorial for Angel Earrings
You don’t need much in the way of supplies for these earrings, but they do include beads that you might not have on hand. All the beads I am using in the video are made by Swarovski. So if you like these earrings, I suggest getting enough supplies for several pairs, so you have extra on hand for those last-minute gifts!
Pattern #1
- Two 11x9mm teardrop beads
- Two 11mm modular beads
- Two 6mm round beads
- Two 8mm marguerite beads
- Two headpins (I used 2″)
- Two earring findings
- Two 12mm artemis beads
- Two 15mm modular beads
- Two 6mm round beads
- Two 8mm marguerite beads
- Two headpins (I used 3″)
- Two earring findings
Two pair of pliers are useful. You’ll definitely need the round nose pliers, and another set is really useful when making the wrapped loops, to get them nice and tight.
The colors I used are crystal and crystal AB for pattern #1. For pattern #2 I used golden shadow and crystal AB. You are certainly welcome to use these color combos, but I also encourage you to explore other colors as well.
And remember — you can use larger beads to make some pendants!
I hope you have enjoyed this video tutorial for angel earrings. For instant gratification jewelry that can be worn all year long, they are hard to beat.
Now go out and make yourself some jewelry! 🙂
Christmas Tree Earrings – A Video Tutorial
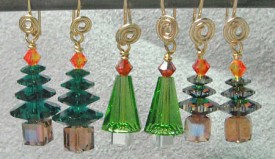
 If you like instant gratification projects, Christmas tree earrings have to be close to the top of the list. They’re fast to make, fun to wear and you can make them in all colors. Greens are a natural, but don’t forget other hues!
In the video tutorial you’re about to watch, you’ll see the pattern that’s been around for years, plus a pattern with a newer bead style from Swarovski.
Keep in mind that while I’m demonstrating earrings, you can also make pendants based on these patterns.
Video Tutorial for Christmas Tree Earrings
First, let’s go through the list of supplies needed for these earrings.
Pattern#1
- Two 4mm bicones
- Two 6mm marguerites
- Two 8mm marguerites
- Two 10mm marguerites
- Two 12mm marguerites
- Two 6mm cubes
- Two headpins
- Two earring findings
Pattern #2
- Two 12mm artemis beads
- Two 4mm bicones
- Two 4mm cubes
- Two headpins
- Two earring findings
For both patterns I used 3mm headpins. You’ll also need a pair of round-nose pliers, and I also suggest a pair of chain nosed pliers to help with making the wrapped loop.
For colors — that is totally up to you! In pattern #1 I used emerald green for the tree, fire opal for the bicone and light topaz for the cube. In pattern #2 the artemis is fern green, the cube silver and the bicones once again fire opal.
Now that I’ve listed the supplies, how about the tutorial itself? Glad you asked, because here it is! I hope you enjoy it, and that you’ll create a multitude of trees for your holiday!
And as always — if you like this tutorial, go ahead and give it a “like” (thank you kindly).
