Beaded Chainmaille Tutorial – Beaded Chainmaille Bracelet
Beaded Chainmaille Bracelet
A beaded chainmaille tutorial you ask? Well, you did ask, so here’s the first of my projects! The beaded chainmaille bracelet jewelry video tutorial is below, but before we get there, let’s talk about jump rings a bit more first.
Jump Rings 101 (Short Version)
I do have a more in-depth post and free PDF about jump rings, but let’s do a quick overview, so you can make sure you have the right rings for the project.
The two most important items are wire gauge (how thick the wire is) and the inside diameter (ID) of the rings. I tend to use 18 gauge wire most often, for the following reasons:
- It’s sturdy enough to not warp easily.
- It has a thickness of 1mm. (Ok, it’s officially 1.02mm, but close enough.)
That means that if the rings I am buying has the size listed as outside diameter (OD), all I have to do is subtract 2mm from that to get the ID. That makes it easy to know the aspect ratio (AR) of the rings — and for that I will have you see the above link for the nitty-gritty details. 😀
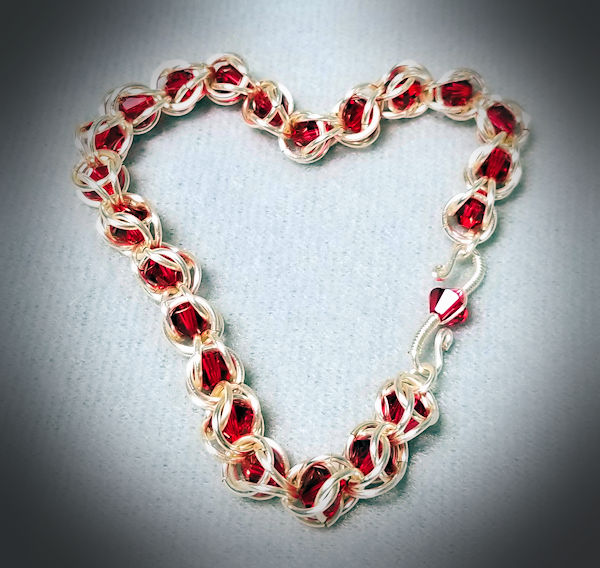
Jump Ring Sizes for the Beaded Chain Maille Tutorial
For the project, you will need 18 gauge jump rings that have an ID of 6mm. You can go as low as 5.9 or as high as 6.5, but 6mm is the “sweet spot”. You’ll also need some smaller rings for the ends — I think the ones I used were around 4mm, but you could use 3.5mm if that’s all you have. And if you only have the 6mm rings, you can use those as well! I just happen to like smaller rings for the ends.
Beads for the Project
For the beads, I highly suggest you use 6mm bicones. The reason is that the bicone shape lets the beads “snuggle down” and lets the top rings close easily. While you can use fire-polished or round beads, I don’t suggest you use them for this particular project — they make it very difficult to get the top rings closed.
(I will shortly have another beaded chainmaille jewelry tutorial that can use fire-polished or round beads – I’ll put the link here as soon as it’s done.)
Clasp — What to Choose?
The clasp is whatever you want to use. I made an S clasp, one that uses the same bead as in the bracelet. There is nothing stopping you from using anything else, though. If you want some ideas for making your own clasp, check out my clasp-making tutorial post.
Ready, Set — Here’s the Video!
Without further ado, here’s the video for the beaded chain maille jewelry tutorial — I hope you enjoy it!
2 Responses to Beaded Chainmaille Tutorial – Beaded Chainmaille Bracelet
![]()
![]()
![]()
![]()
![]()
Leave a Reply