Beaded Chainmaille Tutorial – Beaded Chainmaille Bracelet
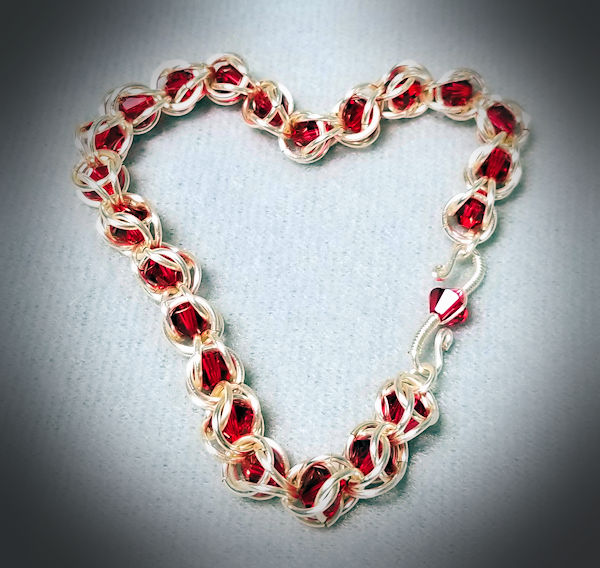
Beaded Chainmaille Bracelet
A beaded chainmaille tutorial you ask? Well, you did ask, so here’s the first of my projects! The beaded chainmaille bracelet jewelry video tutorial is below, but before we get there, let’s talk about jump rings a bit more first.
Jump Rings 101 (Short Version)
I do have a more in-depth post and free PDF about jump rings, but let’s do a quick overview, so you can make sure you have the right rings for the project.
The two most important items are wire gauge (how thick the wire is) and the inside diameter (ID) of the rings. I tend to use 18 gauge wire most often, for the following reasons:
- It’s sturdy enough to not warp easily.
- It has a thickness of 1mm. (Ok, it’s officially 1.02mm, but close enough.)
That means that if the rings I am buying has the size listed as outside diameter (OD), all I have to do is subtract 2mm from that to get the ID. That makes it easy to know the aspect ratio (AR) of the rings — and for that I will have you see the above link for the nitty-gritty details. 😀
Jump Ring Sizes for the Beaded Chain Maille Tutorial
For the project, you will need 18 gauge jump rings that have an ID of 6mm. You can go as low as 5.9 or as high as 6.5, but 6mm is the “sweet spot”. You’ll also need some smaller rings for the ends — I think the ones I used were around 4mm, but you could use 3.5mm if that’s all you have. And if you only have the 6mm rings, you can use those as well! I just happen to like smaller rings for the ends.
Beads for the Project
For the beads, I highly suggest you use 6mm bicones. The reason is that the bicone shape lets the beads “snuggle down” and lets the top rings close easily. While you can use fire-polished or round beads, I don’t suggest you use them for this particular project — they make it very difficult to get the top rings closed.
(I will shortly have another beaded chainmaille jewelry tutorial that can use fire-polished or round beads – I’ll put the link here as soon as it’s done.)
Clasp — What to Choose?
The clasp is whatever you want to use. I made an S clasp, one that uses the same bead as in the bracelet. There is nothing stopping you from using anything else, though. If you want some ideas for making your own clasp, check out my clasp-making tutorial post.
Ready, Set — Here’s the Video!
Without further ado, here’s the video for the beaded chain maille jewelry tutorial — I hope you enjoy it!
How to Make a Tassel – Making Silk and Embroidery Floss Tassels Video
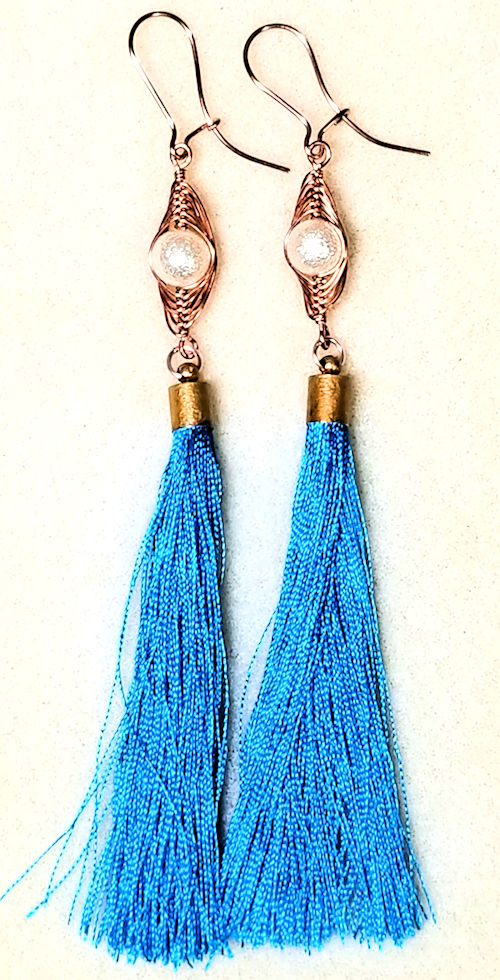 How to make a tassel – this video has some instructions and insights into the fun jewelry art of tassel-making! I’ve seen a lot of jewelry lately featuring tassels – especially silk. Sooooo, I got some silk, rounded up some embroidery floss and embarked on the tassel-making journey.
Then, I thought, why stop there? What about some other beading threads I had laying around — how would they work? Well, I pulled out some of those and tried them out — with various success, as you will see, LOL.
Why Make a Tassel?
Why make a tassel? I guess the question is why not make some? I’ll admit, I never quite saw the charm of them, until I realized how comfortable they are for earrings — very lightweight, when made with silk. You can get those shoulder-dusters without pulling down your earlobes. I don’t know about you, but I’m sensitive to heavy earrings; I have a hard time with them, so I gravitate to smaller ones. Well, problem solved!
Uses for Tassels — They Aren’t Just for Jewelry
I’ll admit, I mostly use them for jewelry. But in making the video and trying out different kinds of thread, I wondered what else they might be used with.
Some obvious items would be chain pulls and edging for lamps. Pillows too — they could use a tassel edging. But what about Christmas tree ornaments? I can see them hanging down, either attached to some regular glass balls, or on their own.
Small tassels could be used for key rings, although I’d probably use leather for those.
What about adding them to tote bags, either as a stand-alone or maybe all around the edges? And of course there is the option to add a tassel as a “charm” to your handbag.
Oh, and I forgot about adding them as accents to your drapes — that is another use that has been in vogue.
Still, my favorites are jewelry — but then again, a lot of what I am and do is somehow related to jewelry. 🙂
Video Tutorial – Get Comfy and Get Watching
OK, so here’s the video. And in case you were wondering, the end caps I used were either 4mm (smaller tassles) or 8mm (tassel with the charm). I got a boatload of them from Amazon for a very inexpensive price — like $10 or so. Since they are all the same shape, I’m working on ways to alter them so they become part of the jewelry, instead of just something to hold the tassel. But — that’s a whole other video!
https://youtu.be/L3xVHjDxSUI
Statement Earrings With Beads – Quick and Easy For How to Make Statement Earrings
How to Make Statement Earrings? Watch the video – it’s easier than you might think!
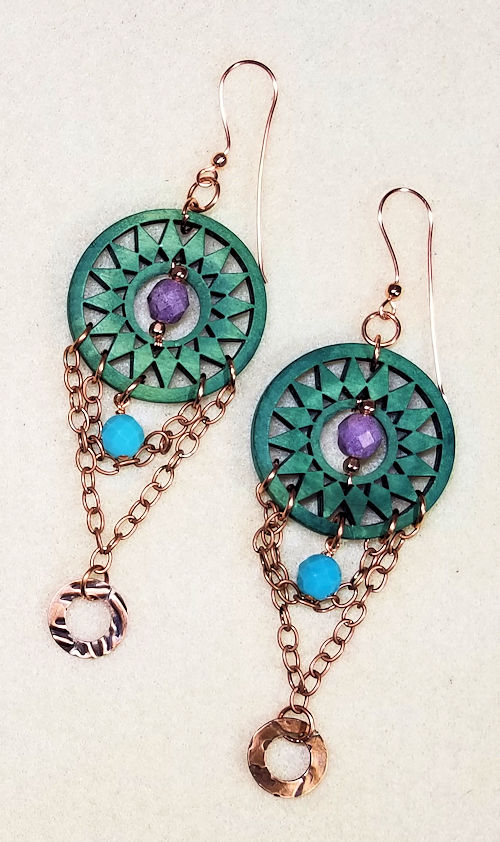
Statement Earrings with beads are big these days – literally and figuratively! And as to how to make statement earrings? They are easier to make than you think – and you may have all the supplies you need right in your jewelry-making stash! These earrings are suitable for beginning and experienced beaders alike; the most important supply is a sense of adventure!
Statement Earrings With Beads – What You Need for Easy Earrings
When I go to Joann or Michael’s for some other kind of supplies, I tend to stop by the jewelry aisle and see if there is anything that catches my eye. It might be some color combo that appeals to me, or maybe a shape that tickles my fancy. I rarely have a specific idea when I put them in my cart, but they go into my “bead stash” for future use.
(I also tend to check out the chains, to see if anything there which appeals to me.)
When I decided to make a video on quick and easy statement earrings, I rummaged through my “big box store stash” as I like to call it. These beads and chains aren’t what you’d call “heirloom quality”, but they are great for when you need some fun jewelry fast. And isn’t that what jewelry making is all about — fun? 😀
The video below shows an example of what you can do with some beads you have hanging around, pleading to be used. You don’t need these exact beads; you probably have something rather similar (or can find something along these lines at Joann, Michael’s Hobby Lobby or even Amazon).
Supplies
- Two large flat beads, medallions or hoops – anything with holes
- 12 inches of chain (roughly); you might want to use more or less
- Round beads, 8mm
- Jump rings
- Wire, 24 gauge or 26 gauge
- Headpins
- Two earring findings
- One dose of a sense of adventure!
You might not need all of the above, depending on where your idea takes you. If you noticed, I didn’t specify the number of round beads, headpins or jump rings — and I only gave you a place to start with the amount of chain you might need. That’s because depending on what’s in your stash, you might need more or fewer of these.
Here’s a video of a set of statement earrings that I made; I hope you enjoy it, and that it inspires some ideas for you.
![]()
![]()
![]()
![]()
![]()