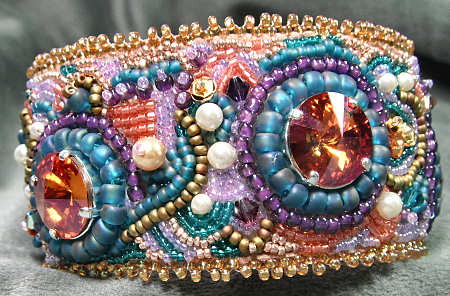
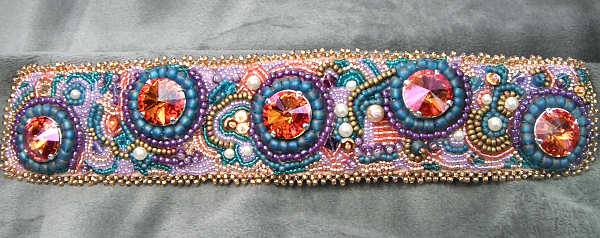
Bead Embroidery Bracelet — “Harlequin’s Romance”
Here’s my first “over the top” bead embroidery bracelet/cuff. While I don’t normally make jewelry that I can’t wear (i.e. really fancy items), after my class with Sherry Serafini I just had to try.
(BTW, if you ever get a chance to take a class with Sherry, do it — she’s a great teacher and very, very nice.)
Bracelet Ingredients
So what went into this bracelet/cuff? It started out with five rivolis, in a color called “Summer Blush” (which is an aftermarket color). I got them already in a sew-on setting, so I didn’t have to go through any gyrations to get them on the bracelet.
I knew I needed some seed beads from sizes 6 through 15, but what colors? I must admit I am color-challenged when it comes to hues I don’t often use (like the orange/peach of the rivolis). Out came the color wheel and I soon had a pallet to work with.
As I worked, other ideas for embellishment popped in my mind. Swarovski pearls and bicones were kind of a given, but then I thought about sequins — now that is something that I never use, so I went digging and found some.
I used the new embroidery backing I had found, plus a heavier Ultrasuede than I normally use. And I almost made a huge goof when it came to the Ultrasuede. I cut out my piece and was getting ready to glue it on to the embroidery foundation when I decided to flip it over and see if I liked the other side better (to face out). Good thing I did, because it was stamped with a lot number!
Lessons Learned With “Harlequin’s Romance”
I learned a lot when making this bracelet/cuff (I’m not sure where the division lies, but this is almost 1.75 inches wide). Some of the lessons include:
Be careful about when you decide to cut the ends! I cut mine too soon, and so the cuff (I’ve decided it’s a cuff now) ended up a wee bit short. Easy fix, seeing as I had a tube clasp readily available, but I was really hoping for a hook and eye.
When you run out of a certain color of beads, don’t panic! Pick another color and carry on.
When using heavier Ultrasuede, make sure to cut it close to the foundation. I tend to cut my Ultrasuede a little larger than the embroidery foundation, and with a lighter-weight Ultrasuede, this works well — it pulls down over the foundation and makes it look nice. With the heavier Ultrasuede, that didn’t work as well, so I had to come up with an alternate plan once I had my edging in place.
The best laid plans go astray when doing freeform bead embroidery. I had to make decisions along the way when my piece was moving in a design direction I hadn’t planned. I just decided to go with it, rather than sweating it. (And with freeform, who’s to know anyway?)
Will There be a Tutorial?
I don’t think I will do a tutorial on “Harlequin’s Romance”, but working it gave me some great ideas for a different bracelet/cuff. I have a plan in the works for a piece of jewelry that can be tailored or full of bling, depending on a few key components. This one will be narrower (maybe 1 inch wide), but with an option for wider (or even narrower).
So that’s the story of this project! But stay tuned, as there is more to come. 🙂


Leave a Reply