Statement Earrings With Beads – Quick and Easy For How to Make Statement Earrings
How to Make Statement Earrings? Watch the video – it’s easier than you might think!
Statement Earrings with beads are big these days – literally and figuratively! And as to how to make statement earrings? They are easier to make than you think – and you may have all the supplies you need right in your jewelry-making stash! These earrings are suitable for beginning and experienced beaders alike; the most important supply is a sense of adventure!
Statement Earrings With Beads – What You Need for Easy Earrings
When I go to Joann or Michael’s for some other kind of supplies, I tend to stop by the jewelry aisle and see if there is anything that catches my eye. It might be some color combo that appeals to me, or maybe a shape that tickles my fancy. I rarely have a specific idea when I put them in my cart, but they go into my “bead stash” for future use.
(I also tend to check out the chains, to see if anything there which appeals to me.)
When I decided to make a video on quick and easy statement earrings, I rummaged through my “big box store stash” as I like to call it. These beads and chains aren’t what you’d call “heirloom quality”, but they are great for when you need some fun jewelry fast. And isn’t that what jewelry making is all about — fun? 😀
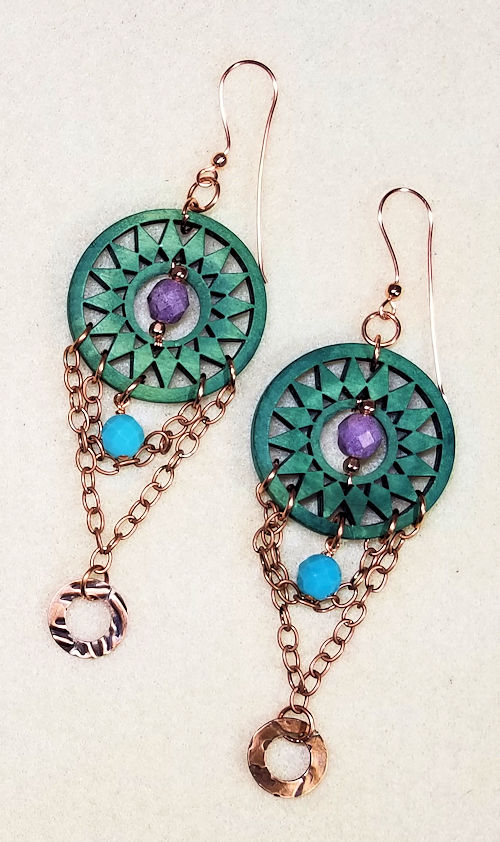
The video below shows an example of what you can do with some beads you have hanging around, pleading to be used. You don’t need these exact beads; you probably have something rather similar (or can find something along these lines at Joann, Michael’s Hobby Lobby or even Amazon).
Supplies
- Two large flat beads, medallions or hoops – anything with holes
- 12 inches of chain (roughly); you might want to use more or less
- Round beads, 8mm
- Jump rings
- Wire, 24 gauge or 26 gauge
- Headpins
- Two earring findings
- One dose of a sense of adventure!
You might not need all of the above, depending on where your idea takes you. If you noticed, I didn’t specify the number of round beads, headpins or jump rings — and I only gave you a place to start with the amount of chain you might need. That’s because depending on what’s in your stash, you might need more or fewer of these.
Here’s a video of a set of statement earrings that I made; I hope you enjoy it, and that it inspires some ideas for you.
Half Persian 3-in-1, 4-in-1 and DragonBack Tutorial
The chain maille HP (Half Persian) weaves are intriguing and DragonBack is exciting! Well, at least that’s my opinion. How a person can take the small rings and make such a densely-woven piece of jewelry was amazing to me. Welcome to the HP world!
Half Persian 3in1, 4in1 and DragonBack Tutorial
I know that HP has the reputation of being difficult, but it really isn’t — at least not without a little help in the very beginning (which of course I provide). Then like most weaves, once you have the rhythm, it’s not all that hard at all! There are lots of very detailed photos to show you what ring goes where.
(Note to anyone reading this post on Google Translate — this ebook is written in English.)
What’s in the Tutorial?
We’ll start out with the easiest of the weaves — the HP3in1. With a couple of tips in the very beginning on how to start the weave, it becomes a whole lot easier!
Once you have the hang of that weave, time to move onto the HP 4in1. This is a beautiful, very dense weave. Once again I provide two different ways to start out the weave to make things that much easier!
Do you want to double your fun? How about a doubled HP 4in1! It’s actually pretty easy, and it’s reversible in a way that can give you two different looks.
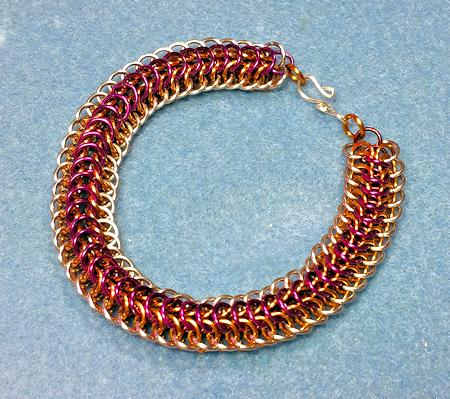
              DragonBack Bracelet
We’ll finish up with DragonBack, which is a weave that is rather unusual and not often seen. It, too, is a dense weave, and it makes a very substantial piece of jewelry. Not to mention an absolutely gorgeous one! But please note — DragonBack and the more commonly-seen DragonScale are not the same weave. In this ebook I teach you DragonBack.
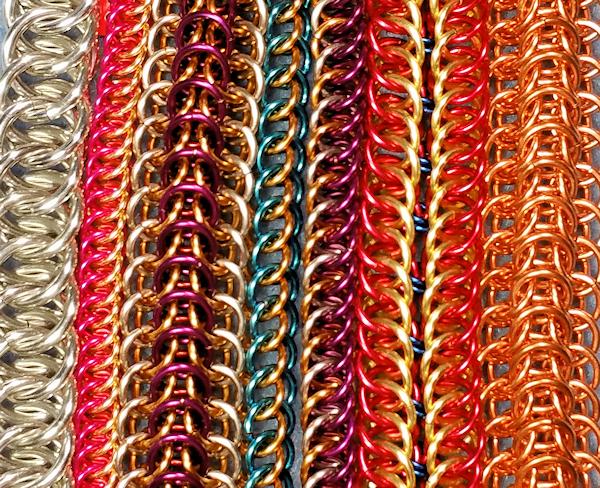
With these weaves, I demonstrate each weave in at least two different color rings, so you can more easily see how the weave is put together. I also show some common mistakes, how to recognize them quickly and how to fix them.
There’s lots in the ebook. It’s 37 pages and has 79 photos, so you have a lot of instructions and plenty of close-ups. The photo at the top of the page shows all the weaves you’ll find in this ebook tutorial. This ebook is in PDF form, and is just a little over 1.6 MB in size.
Purchase the Tutorial
The ebook is just $6, which is a small amount for everything you get, especially with the super-close-up photos — which many times I show multiple angles so you are sure where to put that next ring!
You can buy the ebook securely through the link below. All major credit cards are accepted. Just as an FYI, it does go through the PayPal interface. You will get a link for an immediate download — and then you’re on your way!


Thanks so much for reading this far, and happy maille-ing!
Russian Spiral Gets Reversed! Russian Spiral Video Tutorial
 I’m sure what I call a Reverse Russian Spiral has another name, but it really is just a pattern variation, as opposed to a brand-new stitch.  I called it a reverse spiral some time back, and the name stuck for me.
What’s Different?
In a regular Russian Spiral, the various colors all spiral one way up the rope — they all go in the same direction (typically clockwise). In the reverse method, one of the colors spirals clockwise, and the others counter-clockwise.
So…same stitch, different look. 😀
Video Tutorial
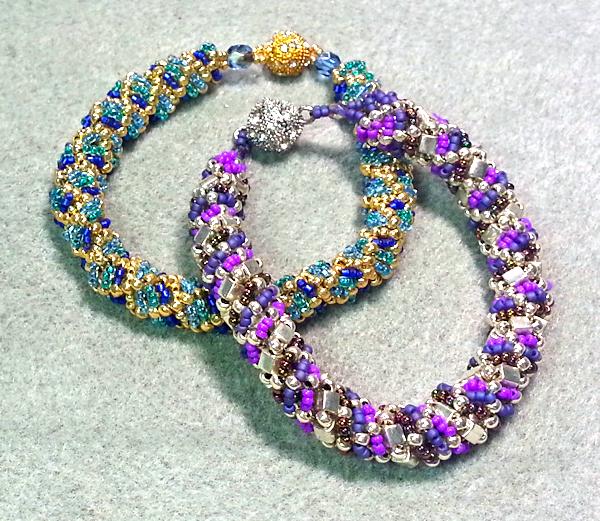
In the video tutorial, I show you how to make the purple bracelet. I alos explain the differences between the purple and the blue bracelet. But first, a little about the supplies.
You will need the following for the purple bracelet:
- Silver 4mm cube beads:Â About 5 grams.
- Permanently galvanized silver seed beads, size 8:Â About 5 or 6 grams.
- Light purple (orchid) opaque size 11 seed beads:Â About 5 grams.
- Dark purple matte size 11 seed beads:Â About 5 grams.
- Purple iris size 11 seed beads:Â About 5 grams.
- Amethyst-colored 4mm fire polished beads:Â 2
- Size 11 beading needle; you can use a size 10 or 12, if you prefer.
- Thread: I used Fireline; you can use 6lb or 8 lb. Or, you could also use a thread like One-G or K-O.
- Clasp of your choice; I used a round silver magnetic clasp.
Now, all you need to do is kick back and watch the video!
![]()
![]()
![]()
![]()
![]()