Get Wired Up! Wrapping, Knitting, Weaving and More
I’ve enjoyed working with wire for many years — in fact, it’s what drew me into making jewelry in the first place! I started with wire work (also known as wire wrapping), then moved onto chain maille, then viking knit, wire crochet and now wire weaving.
So which is my favorite? Hard to choose for sure! In fact, I don’t know that I can choose a favorite, other than to say whichever I feel like working on is my favorite, LOL.
Wrapping Versus Weaving – Is There a Difference?
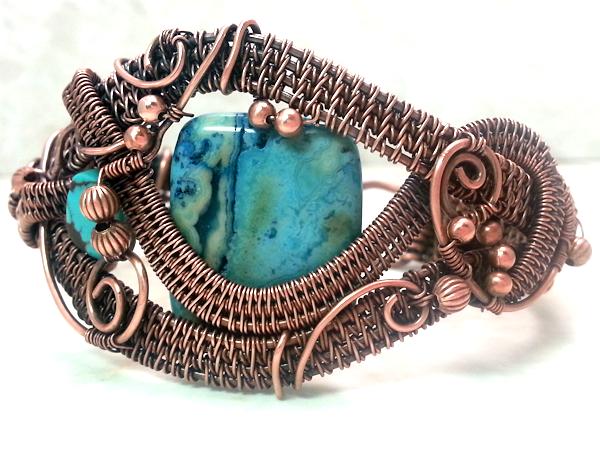
This was actually the very first wire weaving bracelet I ever made. Turned out much better than I had expected. 😀
Some people say there is no difference — that both are just manipulating wire into different shapes. Me, I think there is a difference. When I started with the wire wrapping, it was all about wrapping it around an object. Wire wasn’t made into shapes for the sake of the wire, but to capture something.
Wire weaving, on the other hand, features the wire. There may be a bead or cabochon involved, like in the photo to the right, the real star of the show is the weaving.
There are plenty of patterns for the weaving, involving from two to a zillion base wires. OK, maybe not a zillion, but the bracelet in the photo ended up using 8 base wires in places.
If you’re interested more in manipulating wire, here’s my Youtube playlist on wirework of all kinds.
 Viking Knit
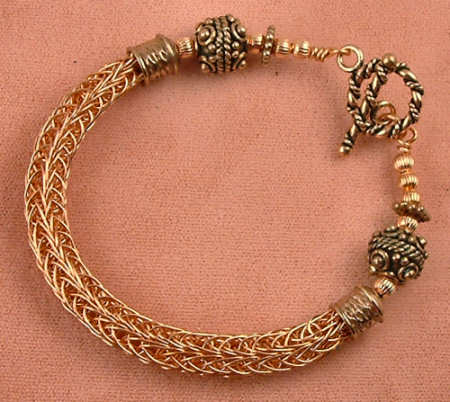
I did (and still do) find viking knit very intriguing. I can’t knit a darned thing with yarn, but I discovered that wire was much easier – for me, at any rate.
Most of the time, viking knit is the means and the end — the wire is very definitely the star. There may be beads incorporated into the jewelry like in the photo to the left, but the emphasis is on the wire knitting.
And similar to wire weaving, there are different patterns that one can use to create jewelry. Single knit and double knit are the most popular, though.
Viking Knit Jewelry Embellishments
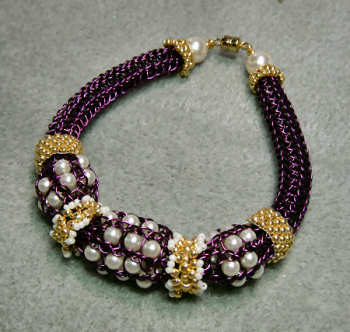
But…if you are interested in something a with a little more integrated, you can do more. How much more? Take a look at the image on the right.
In this bracelet, the viking knit shares the stage with beads. Not just pearls, but also seed beads.
In addition to single knit and double knit, triple knit is also an option. It does make the chain stiffer, but it is quite dense and lovely.
There is also a layered knit which is kind of cool.
If you’d like more info on some more advanced viking knit, check out my ebook tutorial.
Wire Crochet
This is something I’ve only really dabbled in. I like the freedom it provides — the technique is quite organic in nature. Up to now, I’ve primarily worked with varying the size of the stitches within the project and adding random beads. I think my next challenge will be to regulate the size of the stitches and use the same beads within the project. If I can get it worked out, I’ll set up a video for it.
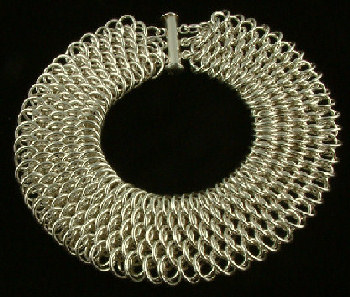
Dragonscale Bracelet, Sterling Silver
Chain Maille
Oh, I’ve got lots of posts on chain maille, and even a second site devoted to it — chainmaillejewelrypatterns.com. I get a kick out of chain maille, and it makes for some gorgeous jewelry.
When I started out with chain maille, sterling silver jump rings were relatively inexpensive — silver was around $7/ounce. I got lots and lots of rings, in all kinds of sizes and gauges. And I set my fingers to maille-ing.
The photo to the left is a pattern called “Dragonscale”. The weave is quite dense, and this particular bracelet was made with sterling silver — talk about substantial! I did sell it and I kind of wish I hadn’t, seeing as I’ve not made another such bracelet again. Well, I take that back…I started another one, but with copper wire, and I haven’t finished it.
I’m also getting ready to publish another ebook for HP 3-in-1 and HP 4-in-one. And in that ebook, I have a pattern called “Dragonback”. That weave is also pretty substantial, but this time I did it in copper. (Once I have it finished, I’ll put a link here.)
Getting Started With Wire
If you’re interested in starting to work with wire, here’s what I would recommend. And the first would be to use copper wire — it’s inexpensive and soft on the hands. Well, maybe “soft” isn’t quite the right term, but it’s much easier to manipulate than brass, bronze or sterling.
I’d recommend a few different wire gauges to start — 18, 20, 22, 26 and 28 are good choices. The 26 and 28 gauges are great for viking knit and crochet. Most of the wire weaving I do are in gauges 22, 26 and 28. However, the heavier gauges are better for parts of the project that are more load-bearing.
Chain maille — again, I suggest copper as your introduction. And I will refer you to my free guide for chain maille rings for a more in-depth discussion for what you should look for in your rings. It will help you to understand things like AR, ID and OD which are very important to your project success.
I hope this post has been helpful, and that you enjoy your journey into working with wire!
Calling All New Beaders! (Actually, Calling All Beaders)
I have had questions on what projects are best for those new to beading. But even experienced beaders may find this post useful, as sometimes we need to go back to our roots. Or, you may need a refresher on a particular technique. So let’s talk beading!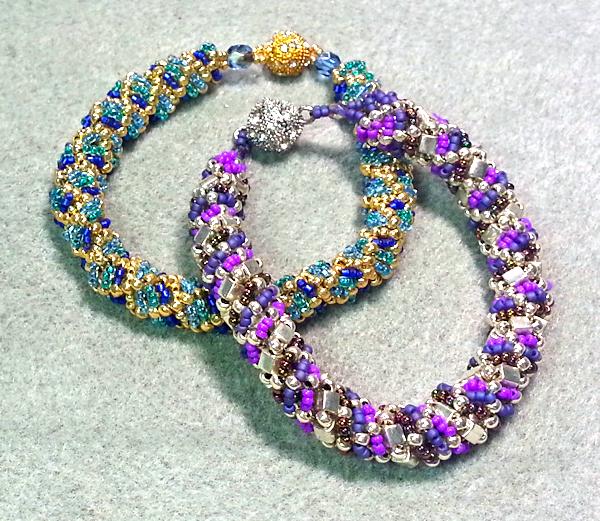
What Jewelry Do You Like?
The first thing is to decide on what you like to wear for jewelry. Are you into bracelets, or do necklaces turn your head? Do you get ecstatic when you pass an earring display, or do you prefer your rings on your hands?
Once you’ve got that decided what you’d like to make, then think of your personal style. Are you someone who likes a clean tailored look or do you prefer something more organic?
And of course — what colors go you prefer? Is your look more muted, or do you go crazy for bold colors?
Choosing Your Project
The reason I asked you to think of all this is because you want to be able to wear your jewelry! And it’s a whole lot more fun when you know you will have a great time not only making it, but wearing it as well.
Of course, maybe you want to make some jewelry for a friend or relative. What kind of jewelry do they like, and of course, what colors do they favor?
Project Suggestions
If I was totally new to beading and wanted to try it with a minimum of money, I’d go for making some stretch bracelets. I have two videos on making them (here’s the link to the other one), so you can get an idea of what might be involved.  Another project that is easy is a wrap bracelet (and of course I have videos on them as well).
If you want something a little more of a step up, try some stringing — you can work with beading wire and crimps to make some gorgeous necklaces, bracelets and even earrings! Naturally…I have a video for that too!
Seed Beads and More
When I first started beading I swore I would never work with seed beads — they were just way too tiny! You can see how that worked out, LOL, since at least half of my videos and most of my ebook tutorials are centered around those tiny glass treasures. Go figure. 😉
One of the easiest weaves using seed beads is probably peyote — once you have the first two rows set up, it’s almost like autopilot — the pattern of the weave is very obvious.
One of my personal favorite beading stitches is Russian Spiral — that’s the pattern in the picture at the top of this post. The weave is easy to follow, and better yet — it works up quickly!
Want some videos on seed bead stitches? Check out my Youtube playlist for the seed beads.
What About Bead Embroidery?
Bead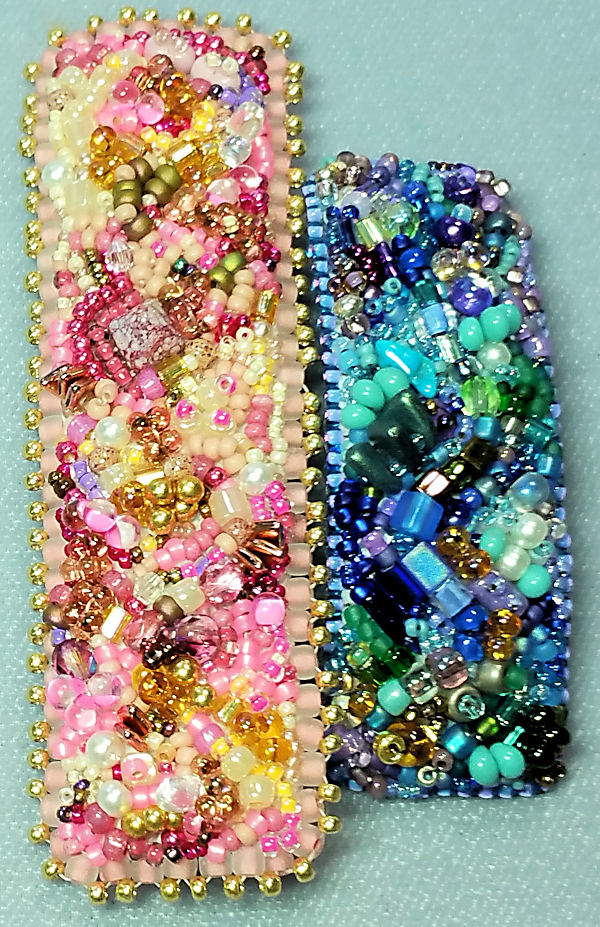 embroidery is gorgeous, and it’s probably a lot easier than you think. I do have a Bead Embroidery 101 video, and if you think you’d like to work with components, I have an ebook tutorial for that. I also have some other bead embroidery videos. Here’s a link to my Youtube Bead Embroidery Playlist.
The thing I like best about bead embroidery is that it’s very, very forgiving. I do a lot of organic work, and it’s a case of “anything goes”. I have to credit Sherry Serafini with my addiction to bead embroidery. While I am in no way in her league, she is my inspiration.
OK, so these are my feelings on beading, per se. Upcoming…my thoughts on all things wire!
Russian Spiral Gets Reversed! Russian Spiral Video Tutorial
I’m sure what I call a Reverse Russian Spiral has another name, but it really is just a pattern variation, as opposed to a brand-new stitch.  I called it a reverse spiral some time back, and the name stuck for me.
What’s Different?
In a regular Russian Spiral, the various colors all spiral one way up the rope — they all go in the same direction (typically clockwise). In the reverse method, one of the colors spirals clockwise, and the others counter-clockwise.
So…same stitch, different look. 😀
Video Tutorial
In the video tutorial, I show you how to make the purple bracelet. I alos explain the differences between the purple and the blue bracelet. But first, a little about the supplies.
You will need the following for the purple bracelet:
- Silver 4mm cube beads:Â About 5 grams.
- Permanently galvanized silver seed beads, size 8:Â About 5 or 6 grams.
- Light purple (orchid) opaque size 11 seed beads:Â About 5 grams.
- Dark purple matte size 11 seed beads:Â About 5 grams.
- Purple iris size 11 seed beads:Â About 5 grams.
- Amethyst-colored 4mm fire polished beads:Â 2
- Size 11 beading needle; you can use a size 10 or 12, if you prefer.
- Thread: I used Fireline; you can use 6lb or 8 lb. Or, you could also use a thread like One-G or K-O.
- Clasp of your choice; I used a round silver magnetic clasp.
Now, all you need to do is kick back and watch the video!
![]()
![]()
![]()
![]()
![]()